🧑🏫 Tutorial Example
Returning to our learning example, you can follow the step-by-step demonstration shown in the video below.
1 — Insert all components
To add a component to the drawing:
a - Select it from the desired category,
b - Click Add,
c - Then click on the canvas where you want to place it.
Begin by inserting all the components exactly as shown in the illustration:

The components required for this setup are:
1 x Syringe Pump - from
pumpgroup1 x Sixteen Port Distribution Valve - from
valvegroup1 x Loop - from
glassesgroup5 x Glass Bottle - from
glassesgroup
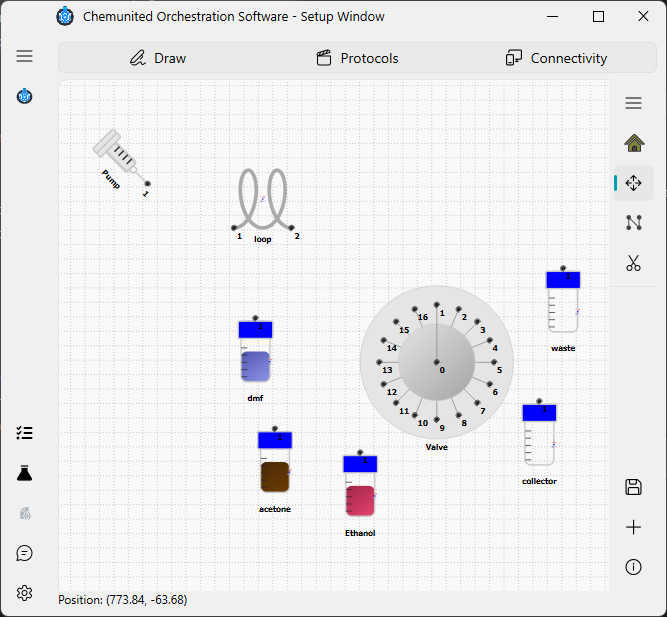
To set an inclination for the pump, simply double-click the component to open the properties window. Then, adjust the angle to 45°.
2 - Build connections
A connection is created by linking two compatible connection points. When building a connection, the user may add several inflection points to better route the connection through the setup layout. Connections can also be reshaped—made more curved or more linear—to improve the clarity and aesthetics of the design.
