Script Editor
After creating a module, you can open and edit its script from the workflow editor.
Opening the script
Enable Inspection Mode (module inspection).
Click the module icon (the block) you want to inspect.
The Script Editor window will appear:
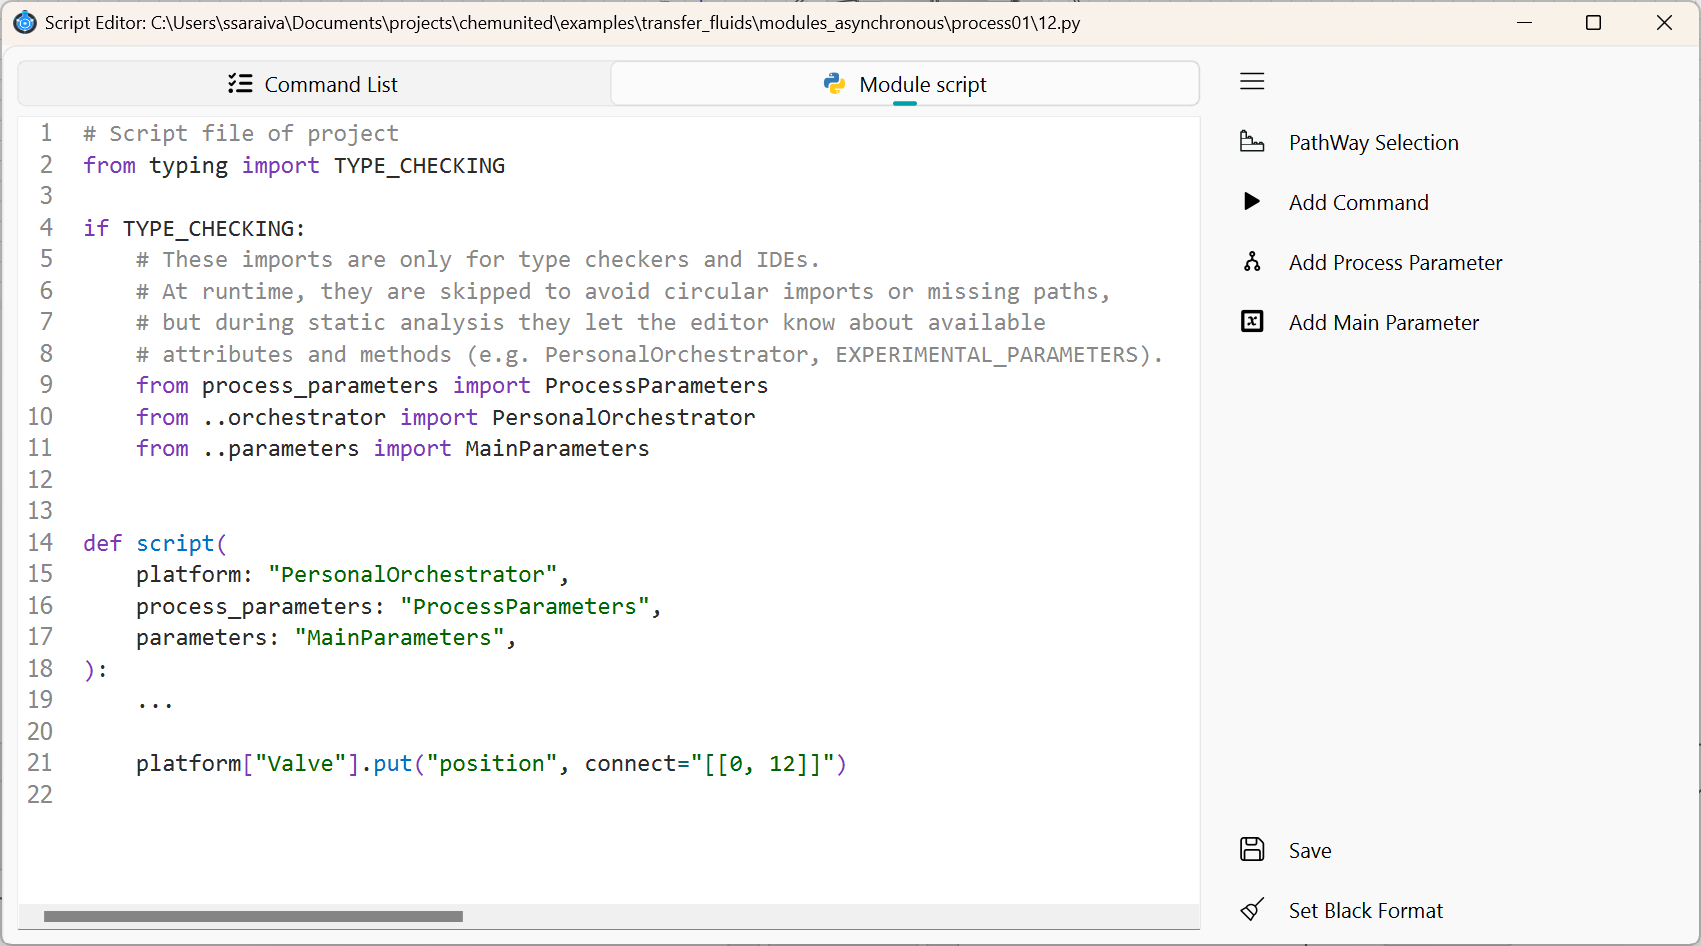
 PathWay Selection
Helper tool to insert special commands for moving fluid between points on the platform.
 Add Command
Helper tool to insert a new command into the script.
 Add Process Parameter
Inserts parameters defined for the current process.
 Add Main Parameter
Inserts global protocol parameters (shared across processes, if applicable).
 Save
Save
Save the script.
 Set Black Format
Formats the script using the black style format.
Building a command
The command builder window (helper tool) is shown below:
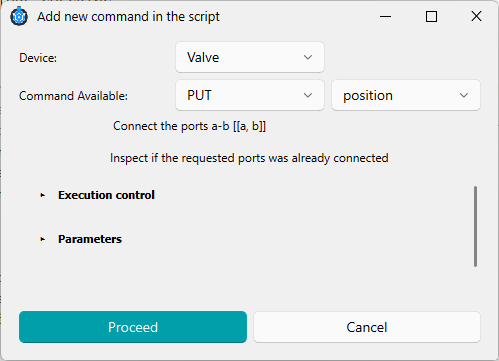
In this window, you can configure:
Device
Lists all available electronic components in the platform.
Command Available
Shows the commands supported by the selected device, including a short description of what each command does.
Commands are organized by HTTP method: GET, PUT, and POST.
GET is typically used to read status or measurements (e.g., sensors).
PUT is typically used to change the device state or behavior (e.g., actuators).
POST is less common and is usually used to send larger or more complex data payloads.
Command options
In the options of the commands we also have.
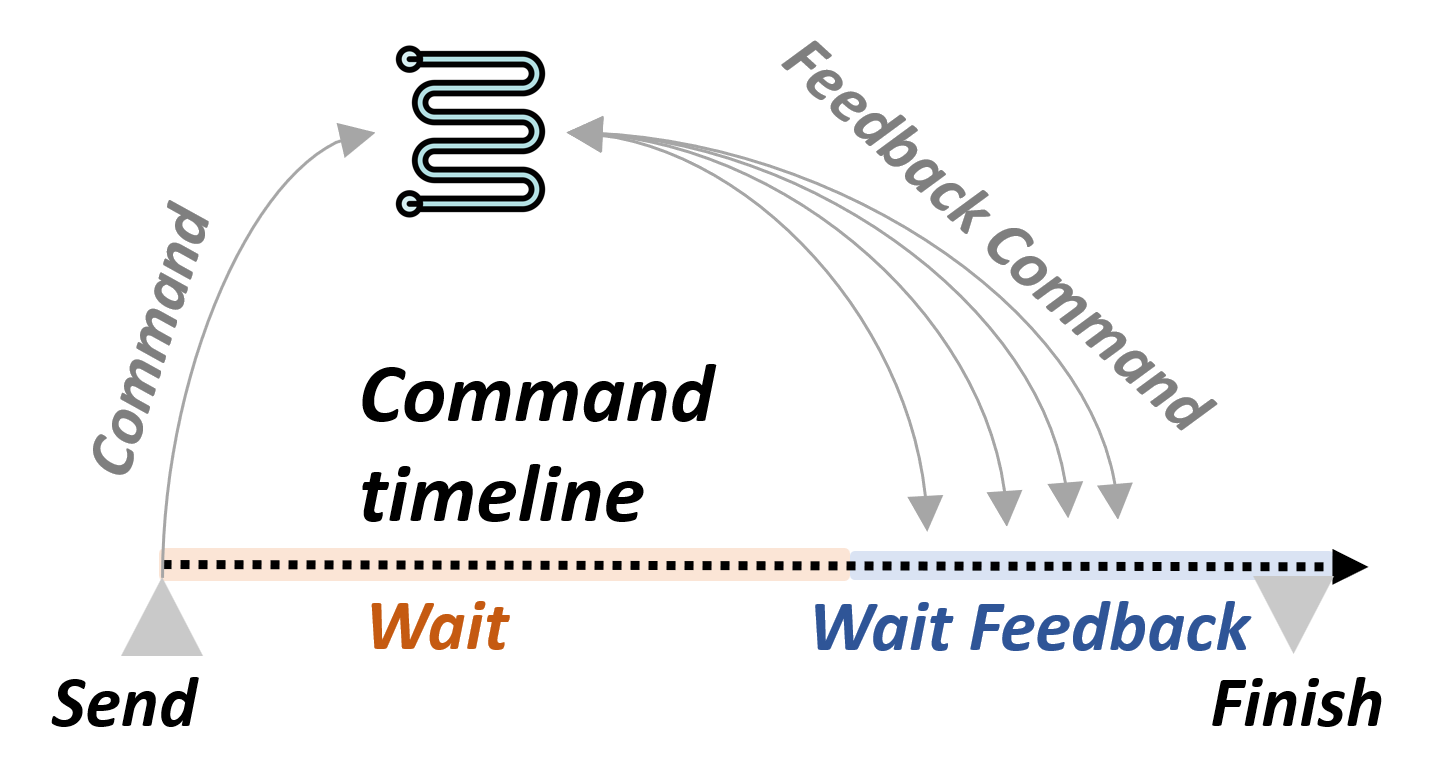
Execution control
Execution control defines how the workflow should wait before continuing to the next command. It includes three configurable options and one informational field, as illustrated below:
Customize Wait Time After Execution
If enabled, the script waits for a custom duration after running the command. The default delay is 1 second, but in some cases the software may compute an internal delay automatically based on the command.
Wait Time (s)
A fixed delay (in seconds) applied before the next command runs. Useful to avoid timing conflicts, device overload, or overlapping actions in the physical setup.
Wait for Feedback Status Change
If enabled, the script pauses until a status change is detected from the device. This ensures the workflow continues only when the system is ready.
Feedback Trigger Command (Informative)
Internal command used by the system to block execution until a hardware or process condition is met. It is issued after the main command and after the configured wait time.
Parameters
Defines the input parameters required by the selected command (if any). The available fields depend on the chosen device and command.
Accessing Parameters
When you click Add Process Parameter or Add Main Parameter, a list of available parameters is displayed.
Select the parameter you want to insert and click Proceed.
Command Line
After you build a command, the editor automatically generates a block of Python code.
In the example below, the script sends a command to pump "pump A" to infuse 5 mL at 20 mL/min.
After sending the command, the script waits 1 second and then continues to the next line.
Note that the command does not wait for pump feedback because wait_feedback_status=False.
...
def script(
    platform: "PersonalOrchestrator",
    process_parameters: "ProcessParameters",
    parameters: "MainParameters",
):
    platform["pump A"].put(  # Component name: pump A
        "infuse",       # Command name
        rate="20.0 milliliter / minute",  # Command parameter
        volume="5 milliliter",            # Command parameter
        wait=1.0,                         # Custom wait time (seconds)
        # If True, waits for device feedback (e.g., pump finishes infusing)
        wait_feedback_status=False,
    )
    ...
If you want to use a predefined parameter from the process or main parameters, insert it in the desired field (or copy and paste it into the generated code).
In the example below, the predefined pump_vol from process_parameters is used as the infusion volume:
...
def script(
    platform: "PersonalOrchestrator",
    process_parameters: "ProcessParameters",
    parameters: "MainParameters",
):
    platform["pump A"].put(  # Component name: pump A
        "infuse",       # Command name
        rate="20.0 milliliter / minute",   # Command parameter
        volume=process_parameters.pump_vol, # Use predefined value
        wait=1.0,                           # Custom wait time (seconds)
        # If True, waits for device feedback (e.g., pump finishes infusing)
        wait_feedback_status=False,
    )
    ...
Special blocks
Two module types behave differently from regular Script modules: Loop and Conditional.
Both modules must return a boolean (True or False), which the workflow uses to decide what to execute next.
In a Loop module, the boolean decides whether the loop continues or stops.
In a Conditional module, the boolean decides which branch will be executed.
1) Loop module
A Loop module is typically used with an iterator to control how many times a section of the workflow should repeat.
How it works
The loop module is executed.
If the script returns
False, the workflow repeats the loop (runs the loop branch again).If the script returns
True, the workflow exits the loop and continues to the next module after the loop.
Example: loop with an iterator
...
def script(
    platform: "PersonalOrchestrator",
    process_parameters: "ProcessParameters",
    parameters: "MainParameters",
) -> bool:
    parameters.add_iterator("loop_1")  # Creates/increments loop_1 at each execution

    # Stop after 3 iterations (0, 1, 2)
    if parameters["loop_1"] > 2:
        del parameters["loop_1"]       # Optional cleanup
        return True                    # Exit loop
    else:
        return False                   # Continue looping
Because the loop decision is based on the function return (True/False), you can build very flexible loops (e.g., looping until a sensor reaches a target, looping until a file exists, etc.), not only fixed iteration counts.
2) Conditional module
A Conditional module chooses between two branches based on the boolean value returned by its script.
How it works
If the script returns True, the workflow follows the True branch.
If the script returns False, the workflow follows the False branch.
Example: simple conditional
...
def script(
    platform: "PersonalOrchestrator",
    process_parameters: "ProcessParameters",
    parameters: "MainParameters",
) -> bool:
    return True  # Follow the True branch